


Wednesday, December 28, 2011
Thursday, December 15, 2011
Wednesday, December 7, 2011

Saturday, December 3, 2011
Baking with Kids ~ Almond Cookies
by Carrie Wells, Ed.D.
I love getting Lydia in the kitchen with me to cook. Last Friday, we decided to bake almond cookies together first thing in the morning. I hope that one day she shares my love of cooking and baking. Here's our recipe - this is a great one for the holidays!


I love getting Lydia in the kitchen with me to cook. Last Friday, we decided to bake almond cookies together first thing in the morning. I hope that one day she shares my love of cooking and baking. Here's our recipe - this is a great one for the holidays!
Almond Cookies
(makes 40 small cookies)

Ingredients
2 sticks (1 cup) of butter, softened
2/3 cup powdered sugar (plus extra for dusting)
1 cup coarsely-ground almonds
2 1/2 cup unbleached flour
1 t vanilla extract
1 t almond extract
pinch of salt
Directions
Preheat oven to 350 degrees.
In a mixer, cream together butter and powdered sugar until well-combined and fluffy.

In a small food processor, coarsely grind almonds.


Add vanilla and almond extracts to the butter sugar mixture and continue to mix.

Add nuts into the butter and sugar mixture and continue to mix.

Add flour to the mixture and continue to mix until combined.

Stir by hand to make sure everything is mixed together well.

Then lick the spatula clean?!

Using a small one-tablespoon scoop, make 40 scoops of cookie dough, evenly-spaced on a silicon baking sheet or greased cookie sheet. Use your fingers to flatten the cookies gently so they will cook evenly.

Bake about 15 - 18 minutes until they are firm and slightly golden along the edges of the cookie. Place on a cooling rack to cool.

Using a fine mesh sifter, dust with powdered sugar and enjoy!
Sunday, November 27, 2011
Hartstrings Review ~ Beautiful Holiday Outfits
by Carrie Wells, Ed.D.
MomSelect offered members the chance to visit a local Hartstrings store to purchase holiday outfits for their children. I jumped on the opportunity to get beautiful new clothes for Lydia and Bryce. We decided to go to the mall as a family today. Little did I know that they were having a huge sale!
As you can see in the sign in the photograph, "Take an Additional 25% off the Entire Store" and to my surprise, all of the holiday items were already 50% off. The customer service associate kindly informed us of the sale and asked if we had any questions.
They had a great selection of holiday outfits for boys and girls! We started by shopping for Lydia. She wears a size 2T/24 months, and they had lots of styles to choose from in that size. I picked out one outfit and Richard picked out another. We had Lydia choose which one she liked more.
Even though Bryce is only 10 weeks old, he is already in a size 6 months. Here were the two possible outfits for him.

So which outfits did we choose?? Here they are!


These outfits are perfect living in Florida. Lydia's dress is made of a sweater material, but it's short-sleeved, so it won't be too warm. It would pair nicely with an off-white cardigan. We also purchased a coordinating red bow to style her hair. Bryce's outfit is long sleeves and pants, but made of lightweight materials so it's not too warm either. They had other options like corduroy pants and heavier sweaters for colder weather. Unlike most other pants for children under a year of age, Bryce's khakis have a real button and zipper, along with the elastic strips on each side to cinch the waist.
I always thought Hartstrings was out of our price range, but now I know that they have amazing sales that make the clothing affordable regardless of budget. I was impressed by the wide selection of items and the friendly staff members. Overall, this was a very successful shopping trip!
To learn more about Harstrings, visit their website to find a retail location near you. You can also check out their Facebook page and twitter for more up-to-date information and great offers.
*I received these products free as part of a promotional program with Hartstrings and MomSelect. The opinions expressed are honest.
MomSelect offered members the chance to visit a local Hartstrings store to purchase holiday outfits for their children. I jumped on the opportunity to get beautiful new clothes for Lydia and Bryce. We decided to go to the mall as a family today. Little did I know that they were having a huge sale!
 |
| Front of the Hartstrings store in Sunrise, FL |
 |
| Wall of holiday clothing |
 |
| Possible outfits for Lydia |
 |
| Possible outfits for Bryce |
We selected our outfits and brought them to the cashier to pay.

Check out our receipt below for two beautiful holiday outfits for the kids with all of the special weekend sales!
 |
| Cost: $52.95 Savings $85.05 |


I always thought Hartstrings was out of our price range, but now I know that they have amazing sales that make the clothing affordable regardless of budget. I was impressed by the wide selection of items and the friendly staff members. Overall, this was a very successful shopping trip!
To learn more about Harstrings, visit their website to find a retail location near you. You can also check out their Facebook page and twitter for more up-to-date information and great offers.
*I received these products free as part of a promotional program with Hartstrings and MomSelect. The opinions expressed are honest.
Tuesday, November 22, 2011
Pumpkin Whoopie Pies
by Carrie Wells, Ed.D.
After reading through a number of recipes, I decided just to create my own Pumpkin Whoopie Pie. They were delicious! I used fresh pumpkin puree that I made by just cutting the pumpkin into several segments, coating in olive oil, and roasting at 425 degrees until tender. Then I put it through a food processor. This freezes really well so you can take out whatever portion you need for baking yummy fall goodies.

After reading through a number of recipes, I decided just to create my own Pumpkin Whoopie Pie. They were delicious! I used fresh pumpkin puree that I made by just cutting the pumpkin into several segments, coating in olive oil, and roasting at 425 degrees until tender. Then I put it through a food processor. This freezes really well so you can take out whatever portion you need for baking yummy fall goodies.

Pumpkin Whoopie Pies
Ingredients
For the cookie:
1 cup of pureed pumpkin
1 stick of butter, softened
1 cup of light brown sugar
2 large eggs
2 t vanilla extract
1 2/3 cup unbleached flour
1 t baking powder
1 t baking soda
1 t salt
1 t cinnamon
1/2 t nutmeg, freshly grated
1/2 t ground cloves
1/2 t ground ginger
For the filling:
4 oz cream cheese
1/2 stick of butter, softened
1/2 cup marshmallow fluff
1 cup confectioner's sugar
1/2 t vanilla extract
Directions:
1. Preheat oven to 350 degrees. Line 2 cookie sheets with parchment paper or a silpat.
2. To make the cookies: combine 1 stick softened butter and brown sugar and beat until light and fluffy. Add the 2 eggs and 2 teaspoons of vanilla extract. In a separate bowl, sift together all dry ingredients. Slowly add dry ingredients into the wet ingredients and mix well. Using a 3 tablespoon scoop, make 10 mounds of batter on each cookie sheet. Bake 12 - 14 minutes. Remove from oven and place on a cookie rack to cool.
3. To make the filling: combine all ingredients in a mixer and beat until well-combined, light, and fluffy. Chill until ready to fill cookies.
4. When the cookies have chilled, place the filling in a piping bag (I used a zipper bag and cut the tip). Pipe the filling on to 10 of the cookies and top with a second cookie. Serve or chill until ready to serve.
Makes 10 whoopie pies.
Saturday, November 19, 2011
A Trip to the Farm!
by Carrie Wells, Ed.D.
The weather was nice this morning, so I decided we'd take a trip to the teaching farm at Tradewinds Park. They have pony rides, a nice playground, and a guided farm tour. This is Lydia getting ready for her first pony ride!


And here's the video:


So toward the end of the guided tour, Lydia decided to do her own thing. She started clucking and moving her arms like a chicken while chasing the rooster. I probably should've stopped her sooner than I did, but it was too hysterical! I couldn't stop laughing.

The weather was nice this morning, so I decided we'd take a trip to the teaching farm at Tradewinds Park. They have pony rides, a nice playground, and a guided farm tour. This is Lydia getting ready for her first pony ride!


And here's the video:
Then we went on a guided farm tour. Lydia was so excited to see the sheep and goats!


So toward the end of the guided tour, Lydia decided to do her own thing. She started clucking and moving her arms like a chicken while chasing the rooster. I probably should've stopped her sooner than I did, but it was too hysterical! I couldn't stop laughing.

Wednesday, November 16, 2011

Thursday, November 10, 2011
Get a Melissa & Doug 25% Off Coupon When You Take the North "Poll"
by Carrie Wells, Ed.D.
Melissa & Doug want you to tell them which of their educational toys you think is the best! Just click on the image below to place your vote in the North "Poll!" You'll get a Melissa & Doug 25% Off Coupon** to use at MelissaAndDoug.com just for voting!

Melissa & Doug want you to tell them which of their educational toys you think is the best! Just click on the image below to place your vote in the North "Poll!" You'll get a Melissa & Doug 25% Off Coupon** to use at MelissaAndDoug.com just for voting!
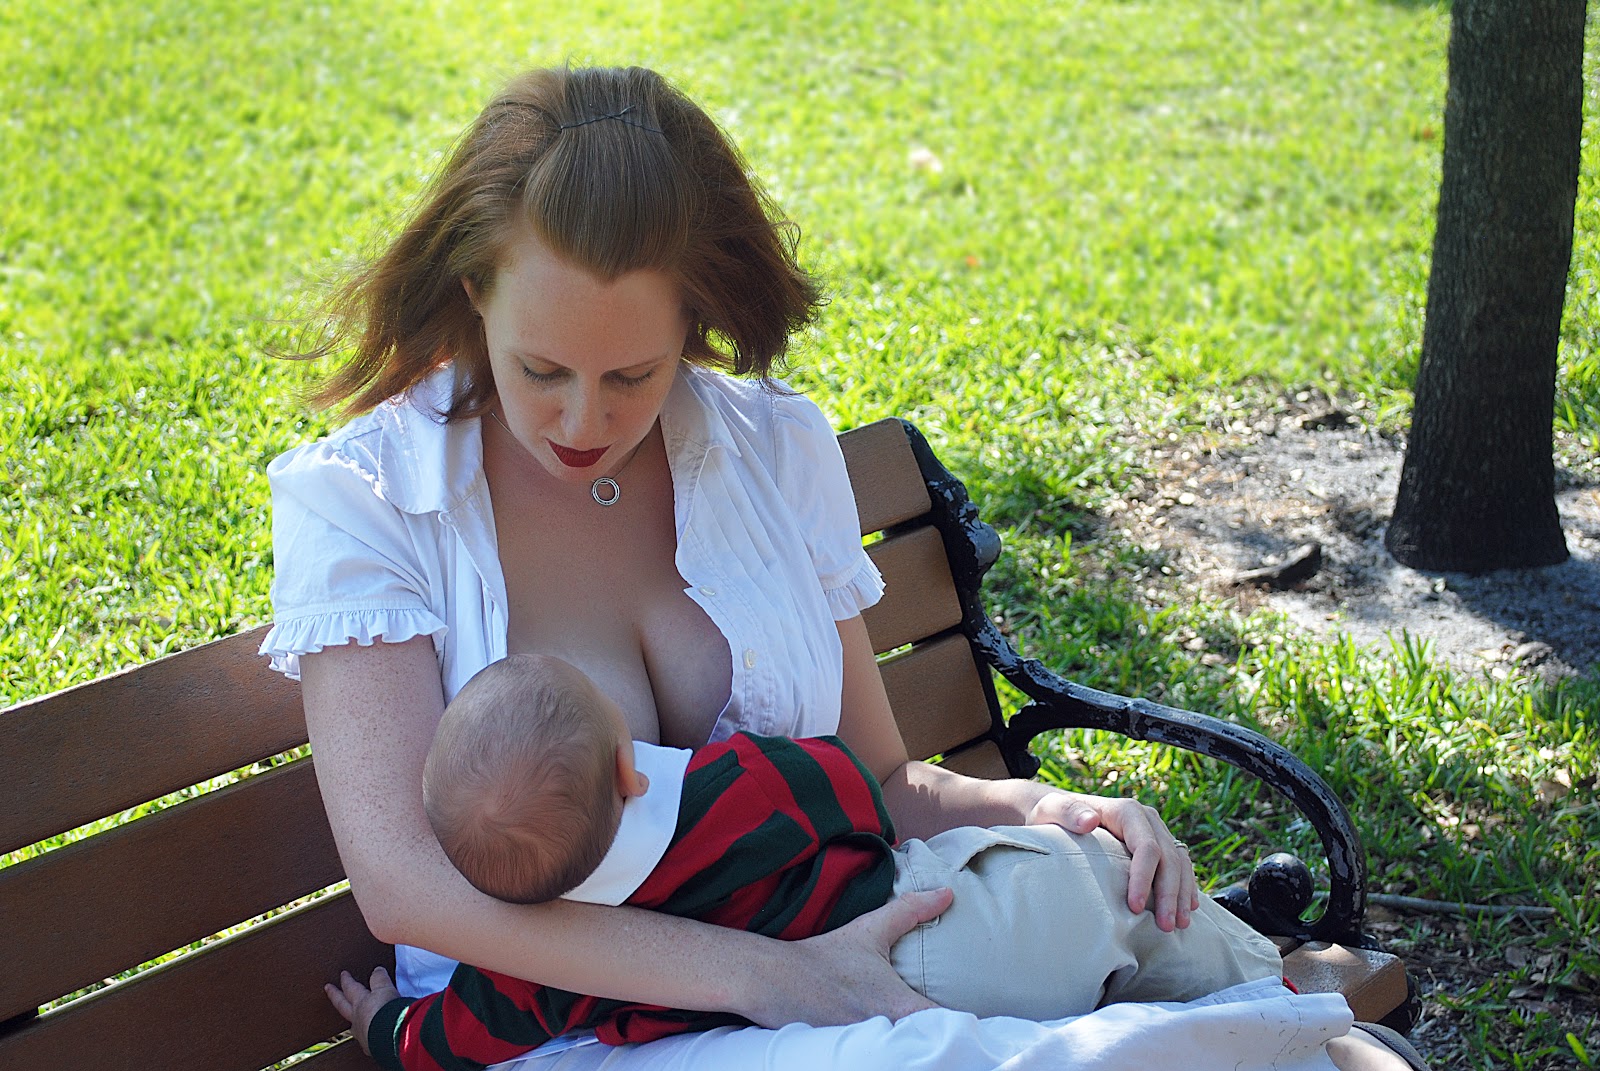
I Know If You Breastfed
by Carrie Wells, Ed.D.
I can always tell if someone either breastfed or bottle-fed breastmilk, formula fed, or never had a baby. It's very simple; that person will ask the question "Is he hungry again?"
When Lydia was born, I didn't fully understand how breastfeeding worked. No one I saw regularly breastfed. I didn't ask a whole lot of questions before giving birth because I felt like breastfeeding was a natural process, and I would just figure it out. Breastfeeding is just using your breast to feed your baby, right? Well, fortunately, I did just figure out the dynamics of it quickly with Lydia. She latched on instantly from day 1 - She was a breastfeeding champ! What I didn't fully understand or know at first was the concept of 'feeding' on demand. I used to leave my daughter alone once or twice a week with my husband starting at around 6 weeks without a bottle of milk for an hour or two at a time. Sometimes he'd look like a crazy man when I would get home from the gym or store because Lydia would cry half the time I was gone. I didn't understand why he couldn't find some way to soothe her while I was gone.
When Lydia was around 2 or 3 months old, my formula-feeding friends and pediatrician said I needed to start scheduling feedings. Without any real knowledge of all the differences between true breastfeeding (I am not including bottle-feeding breastmilk because that, to me, is more like formula-feeding) and formula-feeding, I thought that this idea of spacing out her feedings made sense and would probably help her to be a better sleeper and would fill her up better. But then I realized that wouldn't work. When she cried, she wanted her mommy time. Was she hungry? I don't know. Was she eating too often? Didn't seem to be. Was she getting enough nutrition? She was gaining weight and appeared to be healthy. Did she just want to cuddle and feel safe? Isn't that my main job as a mother? To protect my child and make her feel safe?
People who formula-feed will often say things like "It doesn't really matter long-term" or "I've known breastfed babies who still get sick a lot" or "I was formula-fed and I'm just fine" or "My kid is really smart and he was formula-fed" or "There are so many other ways for parents to bond with their babies." Those may be true but are completely irrelevant to me. I can list endless research-based reasons why breastfeeding is beneficial...but it's not about higher IQ or better immunity or all the nutritional benefits. I don't need to be sold through logic. I do it for one reason: it just feels right.
So "Is he hungry again?" I don't know. "Is he actually eating right now?" Sometimes yes, sometimes no. "Didn't you just feed him?" Don't know if I 'fed' him but I put him to my breast, yes. "Is he eating too much?" Well, he's really big and healthy, so does it matter? Most of all, he's happy and protected and knows he's loved because he gets all of that natural skin-to-skin time with mommy.
Monday, October 31, 2011
Going Dairy-Free...and a new Brownie Recipe!
by Carrie Wells, Ed.D.
Bryce unfortunately has bad eczema and baby acne (along with a mucous-y sound in his chest after feedings sometimes), so it was recommended that I cut the dairy out of my diet while breastfeeding. Apparently there's a protein in dairy products that babies are often sensitive to. While I do not think I could give up dairy for a year (although I'd probably be down to 125 lbs in no time!), I'm willing to try maybe a month to see if it makes a difference. In doing so, I have had to give up some of my favorite foods - cheese, ice cream, and baked goods. I searched for a brownie recipe using coconut oil, cocoa powder, and dairy-free dark chocolate. I found a recipe and modified it accordingly. I think this would actually make a great chocolate chip muffin recipe because of the texture. It also maintains a bit of that coconut flavor, which was quite yummy! So, if you are lactose intolerant or giving up milk-based products for your little one while breastfeeding, try this recipe.
Ingredients
1 cup unbleached flour
1 cup sugar
2 large cage-free eggs
2/3 cup coconut oil
3 Tablespoons of cocoa powder
2 oz dairy-free dark chocolate chunks (I used Dove)
1 tsp vanilla extract
1/2 tsp salt
1/2 tsp baking powder
Directions
Preheat oven to 350 degrees. Use coconut oil to grease an 8" x 8" baking pan. In a mixer on low speed, cream the sugar, eggs, and coconut oil.

Sift the flour, cocoa powder, salt, and baking powder into a medium bowl.

In small batches, add the sifted ingredients into the mixer to combine. Add chocolate chunks.

Pour this mixture into the greased pan. Bake for 25 - 30 minutes.

Makes 9 brownies (as long as you don't eat all the batter with a spoon before it goes into the pan!)

Thursday, October 27, 2011
Please visit my new blog!
by Carrie Wells, Ed.D.
I do a lot of thinking when I am up at 3:30 am breastfeeding my son. A few days ago, I realized that this blog has become less focused as Lydia has gotten a bit older and I have focused more on toddler-friendly activities. So what did I decide to do? Make a toddler-friendly blog. This blog allows me to take all my early education ideas, projects, recipes, etc. and share them with everyone as I teach them to Lydia.
Please visit Busy Lil' Hands when you have an opportunity to do so. Thanks!
Thursday, October 20, 2011
Our Upcycled Pumpkin Patch
by Carrie Wells, Ed.D.


Inspired by a contest hosted by Green Toys, Lydia and I created an Upcycled Pumpkin Patch!

Because Green Toys are made of recycled milk jugs, they are hosting a contest where participants must convert milk jugs into pumpkins. We began by pouring orange craft paint into a 1/2 gallon milk jug. Lydia had to shake, shake, shake to distribute it all.


The next day, we looked around the house for more orange items to turn into pumpkins. We found a small lotion container, a tray from sausages, a basketball, and a food basket. I cut out all different shapes to glue to our "pumpkins." Lydia did the gluing.


With such beautiful fall weather this morning, we gathered all the "pumpkins" (and one real pumpkin) and brought them into the backyard. I happen to have a cantaloupe vine growing that looks like a pumpkin vine...although any big leafy plant would do. We placed all of our pumpkins near the vine so that it looks like a pumpkin patch!

And that's our upcycled pumpkin patch!

I even got inspired to make one more silly "pumpkin" with a slice of pretend cheese... So much fun!

After, I thought it was only appropriate to watch It's the Great Pumpkin, Charlie Brown
Subscribe to:
Posts (Atom)